Country Fried Chicken-Crispy Juicy Homestyle Recipe
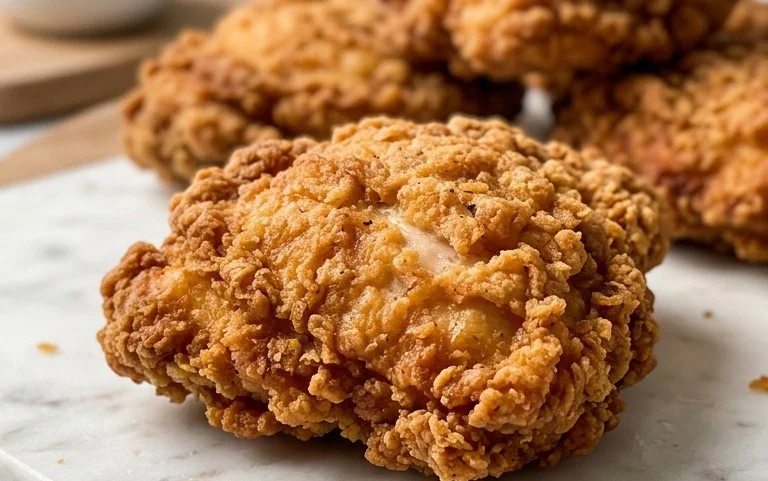
Country fried chicken is more than just a meal; it’s a warm hug on a plate, a culinary embrace from simpler times. There’s a reason this classic dish holds such a special place in so many hearts. The irresistible combination of impossibly crispy, golden-brown exterior giving way to juicy, tender chicken within is pure magic. It’s that satisfying crunch, followed by the savory, flavorful meat, that makes country fried chicken so universally beloved. It evokes memories of family gatherings, Sunday dinners, and the comforting aroma wafting from Grandma’s kitchen. What truly sets our country fried chicken apart is the meticulous attention to detail, from the perfectly seasoned flour dredge to the precise cooking temperature that ensures that iconic crackle and perfect doneness every single time. Get ready to taste pure, unadulterated comfort food perfection!
Country Fried Chicken
There’s something undeniably comforting about a plate piled high with crispy, golden country fried chicken. It’s a classic for a reason – tender, juicy chicken encased in a perfectly seasoned, crunchy crust. This recipe brings that homestyle goodness right to your kitchen, and I’m going to walk you through every step to achieve that irresistible result. Get ready for a taste of pure, unadulterated comfort food.
Ingredients:
- 4 boneless skinless chicken breasts
- 1 ½ cups vegetable oil
- 2 cups buttermilk
- 2 large eggs (whisked)
- 3 teaspoons salt
- 1 ½ cup all-purpose flour
- ½ cup breadcrumbs (plain or Italian)
- 2 ½ teaspoons seasoned salt
- ¾ teaspoon paprika
- ½ teaspoon cayenne pepper
- 1 ½ teaspoon black pepper
Getting Started: Preparing the Chicken
The first step to amazing country fried chicken is properly preparing our chicken. We want to ensure it cooks evenly and is wonderfully tender. Take your 4 boneless, skinless chicken breasts and, using a sharp knife, cut them horizontally to create thinner cutlets. Aim for about ½-inch thickness. This not only helps them cook faster but also ensures that the coating adheres well and gets wonderfully crispy all around. If your breasts are particularly large, you might even consider cutting them into 2 or 3 pieces each to create more manageable portions for frying.
The Buttermilk Bath: Tenderizing and Flavor Infusion
Now comes a crucial step for achieving that signature tender and juicy interior: the buttermilk marinade. Place your prepared chicken pieces in a bowl or a large zip-top bag. Pour the 2 cups of buttermilk over the chicken, ensuring all pieces are submerged. The acidity in the buttermilk works wonders to break down the chicken’s proteins, making it incredibly tender. It also adds a subtle tang that complements the savory coating. Season this bath generously with 1 teaspoon of the regular salt. For optimal results, let the chicken marinate in the refrigerator for at least 30 minutes, but ideally for 2 to 4 hours. This allows the buttermilk to penetrate deep into the meat. If you don’t have buttermilk on hand, don’t worry! You can create a quick substitute by placing 2 tablespoons of white vinegar or lemon juice in a liquid measuring cup and adding enough milk to reach the 2-cup mark. Let it sit for 5-10 minutes until it looks slightly curdled.
Creating the Crispy Coating: The Flour Dredge
While the chicken is marinating, it’s time to prepare our flavor-packed dredging mixture. In a shallow dish or a pie plate, combine the 1 ½ cups of all-purpose flour, ½ cup of breadcrumbs (plain or Italian work equally well, depending on your preference), 2 ½ teaspoons of seasoned salt, ¾ teaspoon of paprika, ½ teaspoon of cayenne pepper, 1 ½ teaspoon of black pepper, and the remaining 2 teaspoons of regular salt. Whisk everything together thoroughly to ensure all the seasonings are evenly distributed. This blend of flour and breadcrumbs is what will give us that wonderfully crisp exterior, while the spices infuse every bite with savory goodness. The cayenne pepper provides a gentle warmth, which you can adjust to your liking.
The Egg Wash: Helping the Coating Stick
In a separate shallow dish, whisk together the 2 large eggs with a splash of the buttermilk (about 2-3 tablespoons) that the chicken is marinating in. This egg wash acts as the glue, helping our flavorful flour mixture adhere beautifully to the chicken. It’s a simple yet essential step for a truly robust and crispy coating that won’t flake off during cooking.
The Frying Process: Golden Perfection
Now for the main event! Heat the 1 ½ cups of vegetable oil in a large, heavy-bottomed skillet or a Dutch oven over medium-high heat. You want the oil to be hot enough to sizzle immediately when you drop a piece of chicken in, but not so hot that it burns the coating before the chicken is cooked through. A good temperature to aim for is around 350°F (175°C). You can test the oil by dropping a tiny bit of the flour mixture into it; if it sizzles vigorously, it’s ready.
Carefully remove the chicken pieces from the buttermilk, letting any excess drip off. Working one piece at a time, dip it into the egg wash, ensuring it’s fully coated. Then, transfer the chicken to the flour mixture, pressing gently to make sure the coating adheres all over. Ensure every nook and cranny is covered. You can even double-dip by dipping the floured chicken back into the egg wash and then back into the flour mixture for an extra-thick, super-crispy crust.
Gently place the coated chicken pieces into the hot oil, being careful not to overcrowd the skillet. Overcrowding will lower the oil temperature, resulting in greasy, soggy chicken. Fry the chicken in batches for about 5-7 minutes per side, or until it’s golden brown and cooked through. The internal temperature of the chicken should reach 165°F (74°C). Use tongs to flip the chicken, ensuring even browning on both sides.
Once each batch is cooked to golden perfection, remove the chicken from the skillet and place it on a wire rack set over a baking sheet. This allows any excess oil to drain off, keeping your chicken delightfully crispy. You can even pop it into a warm oven (around 200°F or 93°C) while you fry the remaining batches to keep it warm. Serve your country fried chicken hot with your favorite sides like mashed potatoes, gravy, and coleslaw for a meal that truly warms the soul. Enjoy the fruits of your labor – a perfectly fried, incredibly delicious chicken dinner!
Conclusion:
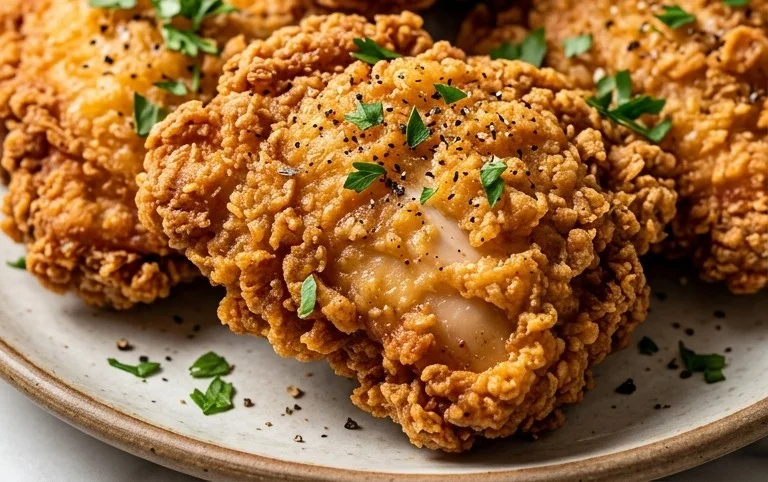
And there you have it – a foolproof guide to making incredible country fried chicken right in your own kitchen! This recipe delivers that irresistible combination of a perfectly crispy, golden-brown crust and incredibly juicy, tender chicken within. It’s the ultimate comfort food, bringing a taste of home and a hearty meal that’s sure to impress everyone at the table. I truly believe this recipe is a winner because it balances simplicity with spectacular results. Don’t be intimidated by the frying process; with a little care, you’ll achieve that authentic diner-style perfection.
For serving, I love to pair this country fried chicken with classic sides like creamy mashed potatoes and gravy, sweet corn on the cob, or a fresh, tangy coleslaw. Don’t forget a dollop of hot sauce for an extra kick! If you’re feeling adventurous, consider variations like adding a touch of smoked paprika or cayenne pepper to your flour dredge for a subtle spicy twist, or experimenting with different herb combinations in your buttermilk marinade.
I wholeheartedly encourage you to give this recipe a try! It’s a rewarding culinary adventure that will become a go-to favorite. The satisfaction of pulling perfectly fried chicken from the pan is unparalleled.
Frequently Asked Questions:
Can I make this country fried chicken ahead of time?
While it’s best enjoyed fresh, you can prepare the chicken pieces (season and dredge them) a few hours in advance and keep them refrigerated. However, for the crispiest results, frying them just before serving is highly recommended.
What kind of oil is best for frying?
A neutral-flavored oil with a high smoke point is ideal. Vegetable oil, canola oil, or peanut oil are excellent choices for achieving that perfect golden crisp without imparting any unwanted flavors.
How can I prevent the chicken from getting soggy?
Ensure your oil is at the correct temperature (around 325-350°F or 160-175°C) before adding the chicken. Don’t overcrowd the pan, as this will lower the oil temperature and lead to greasier, less crispy chicken. Drain the fried chicken on a wire rack set over a baking sheet, rather than paper towels, to allow air to circulate and maintain crispness.
Country Fried Chicken
Crispy and tender country-style fried chicken, perfect for a classic comfort meal. This recipe uses boneless, skinless chicken breasts for ease and quick cooking.
Ingredients
-
4 boneless skinless chicken breasts
-
2 cups buttermilk
-
2 large eggs
-
3 teaspoons salt
-
1 ½ cup all-purpose flour
-
½ cup breadcrumbs
-
2 ½ teaspoons seasoned salt
-
¾ teaspoon paprika
-
½ teaspoon cayenne pepper
-
1 ½ teaspoon black pepper
-
1 ½ cups vegetable oil
Instructions
-
Step 1
Prepare the chicken: Trim any excess fat from the chicken breasts. If they are very thick, you can pound them slightly to an even thickness for more consistent cooking. -
Step 2
Make the dredge: In a shallow dish, whisk together the all-purpose flour, breadcrumbs, seasoned salt, paprika, cayenne pepper, and black pepper. In a separate shallow dish, whisk the eggs and buttermilk together. -
Step 3
Coat the chicken: Dip each chicken breast first into the buttermilk and egg mixture, allowing excess to drip off. Then, dredge it thoroughly in the flour mixture, pressing to ensure it is well coated. Place coated chicken on a wire rack. -
Step 4
Heat the oil: In a large, heavy skillet or Dutch oven, heat the vegetable oil over medium-high heat until it reaches about 350°F (175°C). You can test the oil by dropping a pinch of flour into it; it should sizzle immediately. -
Step 5
Fry the chicken: Carefully place 1-2 chicken breasts into the hot oil, ensuring not to overcrowd the skillet. Fry for about 5-7 minutes per side, or until golden brown and cooked through. The internal temperature should reach 165°F (74°C). -
Step 6
Drain and serve: Remove the fried chicken from the skillet and place it on a wire rack set over a baking sheet to drain excess oil. Let rest for a few minutes before serving.
Important Information
Nutrition Facts (Per Serving)
It is important to consider this information as approximate and not to use it as definitive health advice.
Allergy Information
Please check ingredients for potential allergens and consult a health professional if in doubt.