No-Bake Pumpkin Cheesecake Balls – Easy Recipe
No Bake Pumpkin Cheesecake Balls are the ultimate fall treat, and I’m so excited to share this ridiculously easy recipe with you! Forget spending hours in the kitchen; these delightful bites are here to satisfy all your autumnal cravings without ever turning on the oven. We all adore cheesecake for its creamy, decadent texture, and when you combine that with the warm, comforting embrace of pumpkin spice, you have a match made in dessert heaven. What truly makes these No Bake Pumpkin Cheesecake Balls so special is their perfectly portioned, bite-sized nature. They’re ideal for parties, potlucks, or simply enjoying a little sweet indulgence without the fuss of slicing a whole cake. Plus, the “no-bake” aspect means less cleanup and more time spent savoring every single delicious morsel. Get ready to fall in love with these simple yet spectacular treats!
No Bake Pumpkin Cheesecake Balls
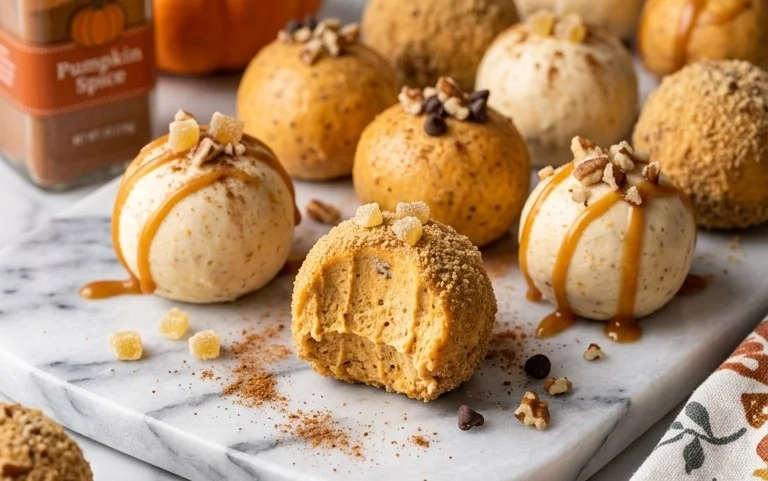
Get ready to wow your taste buds and impress your friends with these absolutely divine No Bake Pumpkin Cheesecake Balls! They’re the perfect little bites of autumnal bliss, bursting with the warm flavors of pumpkin and spice, all wrapped up in a creamy, dreamy cheesecake filling and a smooth white chocolate coating. The best part? No oven required! These are a fantastic treat for holiday gatherings, potlucks, or just a cozy evening in. They’re surprisingly easy to make and always a guaranteed crowd-pleaser. I love how these little gems capture the essence of fall in every bite. The combination of graham cracker and gingersnap crumbs provides a delightful texture contrast to the smooth, rich cheesecake filling. And the white chocolate coating? Pure perfection! Let’s dive into creating these delicious treats.
Ingredients:
Preparing the Cheesecake Filling
The foundation of our delicious cheesecake balls lies in creating a rich and flavorful filling. This step is crucial for achieving that classic cheesecake taste and creamy texture that we all adore. Make sure your cream cheese is truly softened; this will make it much easier to incorporate smoothly with the other ingredients, preventing any lumps.
1. In a large mixing bowl, combine the softened cream cheese and the powdered sugar. Use an electric mixer on medium speed to beat these together until the mixture is completely smooth and creamy, with no visible sugar granules remaining. This step is key to ensuring a silky smooth cheesecake filling. Scrape down the sides of the bowl as needed to make sure everything is well incorporated.
2. Now, it’s time to introduce the star of our fall flavors: the pumpkin puree and pumpkin pie spice. Add the ⅔ cup of pumpkin puree and 1 teaspoon of pumpkin pie spice to the cream cheese mixture. Continue to beat with the electric mixer until everything is thoroughly combined and the color is a beautiful, uniform orange. The aroma at this stage is already so inviting!
3. Next, we’ll fold in our delicious crumb mixture. Add the 1 ½ cups of graham cracker crumbs and the 1 ½ cups of gingersnap crumbs to the pumpkin cream cheese mixture. Use a sturdy spatula or a wooden spoon to gently fold these crumbs into the filling. You want to incorporate them fully, but avoid overmixing, as this can make the balls too dense. The goal is to have a thick, scoopable mixture that holds its shape.
Chilling and Shaping the Balls
Before we can coat our delightful cheesecake bites, they need a little time to firm up. This chilling process is essential for making them easy to handle and ensuring they hold their shape when rolled into balls.
4. Once your filling is ready, cover the mixing bowl tightly with plastic wrap. Place the bowl in the refrigerator and chill for at least 2 hours, or until the mixture is firm enough to scoop and roll. This chilling time allows the flavors to meld and the mixture to become firm. You can also speed this up by placing the bowl in the freezer for about 30-45 minutes, but keep a close eye on it to prevent it from freezing solid.
5. After the mixture has chilled and firmed up, it’s time to roll. You can use a small cookie scoop or two spoons to portion out the cheesecake mixture. Roll each portion into a smooth, bite-sized ball, about 1 inch in diameter. As you roll them, place them on a baking sheet lined with parchment paper. This makes them easy to transfer and prevents sticking. You should aim for roughly 30-40 balls, depending on their size. If the mixture becomes too soft as you work, you can pop the tray back into the refrigerator for a short while to firm it up again.
Melting and Coating
The final, glorious step is coating these cheesecake delights in luscious white chocolate. This is where they transform from delicious filling to irresistible treats.
6. Now, let’s get ready for the chocolate coating. In a microwave-safe bowl, add the 16 ounces of white almond bark. Microwave on 50% power for 30-second intervals, stirring well after each interval, until the bark is completely melted and smooth. Be patient with this process; overheating almond bark can cause it to seize. Once melted, stir in the 2 cups of white chocolate chips. Continue to stir gently until the white chocolate chips are fully melted and incorporated into the almond bark. The residual heat from the almond bark should be enough to melt the chips. This combination creates a wonderfully smooth and dippable coating.
7. Using a fork or a toothpick, carefully dip each chilled cheesecake ball into the melted white chocolate coating. Allow any excess chocolate to drip back into the bowl. Place the coated balls back onto the parchment-lined baking sheet. You can also use a small spatula to help gently lift them if needed. This part is quite satisfying as you see them transform!
8. If you’re feeling fancy, or just want to add an extra pop of fall color, you can prepare the optional orange candy melts. Melt the orange candy melts in a separate microwave-safe bowl using the same method as the white almond bark. Once melted and smooth, transfer the orange candy melts to a small piping bag or a zip-top bag with a tiny corner snipped off. Drizzle the melted orange candy over the white chocolate-coated cheesecake balls in a decorative pattern. This adds a beautiful visual element and a hint of contrasting flavor.
9. Once all the balls are coated and decorated, place the baking sheet in the refrigerator for at least 30 minutes, or until the chocolate coating is completely set and firm. This allows everything to solidify properly. You can also freeze them for about 15-20 minutes if you’re in a hurry.
Serving and Storing
Your No Bake Pumpkin Cheesecake Balls are now ready to be enjoyed! They are best served chilled. Store any leftovers in an airtight container in the refrigerator for up to 5 days. These are truly a delightful treat that brings the joy of pumpkin spice season right to your fingertips, no baking required! I hope you love them as much as I do. They are perfect for sharing, but I won’t blame you if you want to keep them all to yourself!
Conclusion:
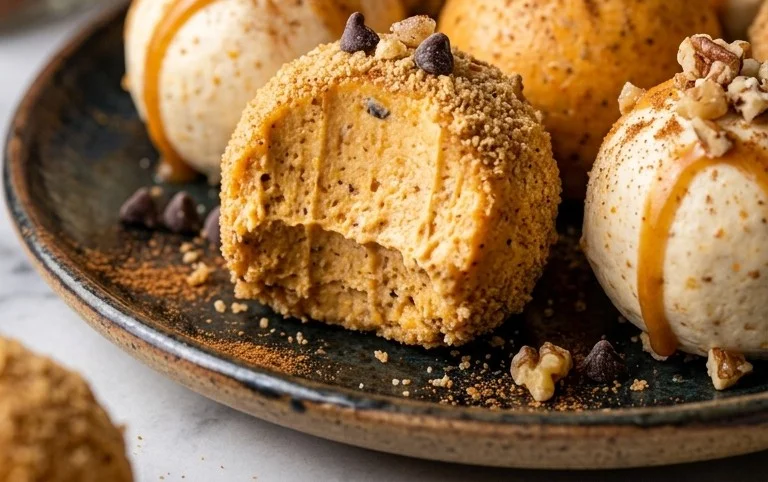
There you have it – your guide to creating absolutely delightful no bake pumpkin cheesecake balls! I truly hope you’re as excited to try this recipe as I am about sharing it. These little bites of autumnal bliss are a game-changer because they deliver all the creamy, tangy, spiced flavor of pumpkin cheesecake without any of the baking fuss. They are perfect for potlucks, holiday gatherings, or simply as a special treat to brighten your day. Imagine the smiles when you present a platter of these perfect little spheres of happiness!
When it comes to serving, these no bake pumpkin cheesecake balls are incredibly versatile. They’re fantastic on their own, but also wonderful served alongside a cup of hot apple cider or coffee. For a little extra flair, consider dusting them with cinnamon or drizzling them with a caramel sauce. Don’t be afraid to get creative with variations! You could add a pinch of nutmeg for a deeper spice profile, or even fold in some finely chopped pecans for a delightful crunch. The possibilities are truly endless, making this a recipe you’ll revisit again and again.
I genuinely encourage you to give these no bake pumpkin cheesecake balls a whirl. They are surprisingly easy to make, incredibly delicious, and are sure to be a crowd-pleaser. So grab your ingredients and let the festive fun begin!
Frequently Asked Questions:
Can I make these ahead of time?
Absolutely! These no bake pumpkin cheesecake balls are perfect for making ahead. You can store them in an airtight container in the refrigerator for up to 3-4 days. In fact, I find they taste even better after a day as the flavors meld together beautifully.
What if I don’t have cream cheese?
While cream cheese is essential for the cheesecake texture, you could experiment with a dairy-free cream cheese alternative if needed. Just ensure it’s a firm variety that holds its shape well. The flavor profile might shift slightly, but it should still be delicious!
Can I freeze these?
Yes, you can freeze them! Place the cheesecake balls on a baking sheet lined with parchment paper and freeze until firm. Once frozen, transfer them to a freezer-safe container or bag. They should keep well for up to 1-2 months. Thaw them in the refrigerator overnight before enjoying.
No Bake Pumpkin Cheesecake Balls
Delightful no-bake pumpkin cheesecake balls coated in white almond bark with an optional orange candy melt drizzle. Perfect for fall gatherings or any time a sweet treat is desired.
Ingredients
-
2 cups white chocolate chips
-
8 ounces cream cheese, softened
-
⅓ cup powdered sugar
-
⅔ cup pumpkin puree
-
1 teaspoon pumpkin pie spice
-
1 ½ cups graham cracker crumbs
-
1 ½ cups gingersnap crumbs
-
16 ounces white almond bark
-
1 cup orange candy melts
Instructions
-
Step 1
In a large bowl, beat the softened cream cheese until smooth. Add powdered sugar and pumpkin pie spice, beating until well combined. -
Step 2
Stir in the pumpkin puree and mix until just combined. Be careful not to overmix. -
Step 3
Add the graham cracker crumbs and gingersnap crumbs to the cream cheese mixture. Mix until a dough forms and can be rolled. -
Step 4
Roll the mixture into small balls, about 1-inch in diameter. Place them on a baking sheet lined with parchment paper and freeze for at least 30 minutes, or until firm. -
Step 5
Melt the white almond bark according to package directions. Dip each frozen cheesecake ball into the melted almond bark, ensuring it is fully coated. Return to the parchment-lined baking sheet. -
Step 6
If using, melt the orange candy melts and drizzle over the coated cheesecake balls. Let the coating set completely before serving.
Important Information
Nutrition Facts (Per Serving)
It is important to consider this information as approximate and not to use it as definitive health advice.
Allergy Information
Please check ingredients for potential allergens and consult a health professional if in doubt.